Ingredients for 1 servings:
- 50 g wholemeal rye flour (for pre-dough or sourdough refresher)
- 50 ml water (for pre-dough or sourdough refresher)
- 50 g rye starter (for pre-dough or sourdough refresher)
- 200 g wholemeal rye flour
- 100 g whole wheat flour
- 100 g wheat flour type 405 or 550
- 300 ml water
- 60 g starter from the sourdough refresher
- 8 g salt
Instructions
Working time approx. 30 minutes; Rest time approx. 12 hours; Cooking/baking time approx. 1 hour; Total time approx. 13 hours 30 minutes
A really simple recipe for sourdough bread (mixed rye bread) that is reduced to the essentials and can be varied as desired.
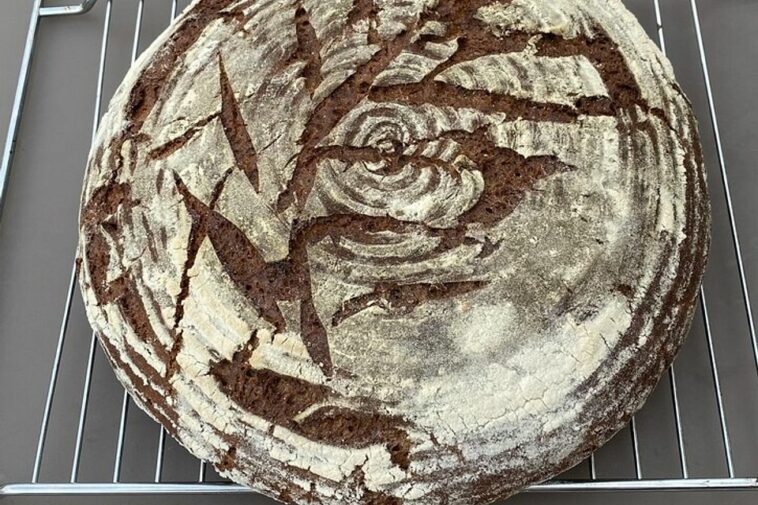
In my search for the simplest sourdough recipe for beginners, without any unnecessary frills, I landed on the following recipe. It allows you to bake truly rustic sourdough loaves with a “gscheider” (decent) crust, and requires nothing but a bowl, a work surface, an oven (optionally with a pizza stone or roasting pan or Dutch oven), and perhaps a dough scraper. The flour types can be swapped to a certain extent, and spices or seeds can be added according to individual preference. For starters, however, I would recommend sticking with the basic recipe and getting a feel for how to handle the dough and the resulting bread. Namely, a truly delicious loaf! Pre-dough or sourdough refresher: First, the existing starter needs to be refreshed. Simply mix equal parts rye flour and water in a container (e.g., a preserving jar with a higher rim) and let stand at room temperature (approx. 20 degrees Celsius) until the sourdough starts to bubble and has increased in volume by 2/3. Autolyse dough: Next, mix the flour for the autolyse dough and add 75% water (based on the amount of flour). Cover and let stand for just over an hour. Main dough: Now add the pre-dough to the autolyse dough, using approximately 15g per 100g of flour. Then add a little salt: 2g per 100g of flour. Fold everything together nicely (kneading is unnecessary). Do this every now and then over the next 2-3 hours. Heat up and prove. When the dough no longer immediately expands when pressed, heat the oven to full blast. In my case, this is only 250°C; more would certainly be desirable, but my experience only goes so far. While you’re at it, store the firebrick or roasting pan in the oven and heat it up. Then round the dough (roughly shape it into a loaf) and place it in the proving basket (or a sieve, or a bowl) that you’ve previously lined with a clean, floured linen cloth. Then wait an hour. Bake. As soon as the oven is really hot, tip the bread out of the proving basket and decorate it with an artistic design using a razor blade or sharp knife (otherwise you might as well go straight to the baker) and put it in the oven. Immediately after putting it in the oven, pour a little water onto the oven floor (or a baking tray underneath the firebrick) to create plenty of steam. Danger of scalding! After 10 minutes, open the oven slightly to let out the steam, close it again, and finish baking the bread in about 50 minutes. (With a roasting pan, leave the lid on for the first 10 minutes, then remove it and reduce the heat.) The bread will have a good crust and will sound hollow when tapped when it’s done. It’s best to let it rest in the oven a bit before eating, although fresh bread usually tastes best. Cheers!


Facebook Comments