Chocolate gives your pastries and cakes the finishing touch. However, you should temper them beforehand. We have summarized how you can do this and what you should pay attention to in our home article.
Tempering chocolate – you need that
Chocolate that has melted and hardened again does not have a shine and usually looks pale and is therefore not particularly attractive. However, if you temper the chocolate, you get a nice shine. We have summarized what you need for this below.
- You need a pot of water, a spoon, a kitchen knife, a wooden cutting board, a metal bowl, and a kitchen scale. The bowl must fit into the pot.
- If you use a kitchen thermometer, you can maintain optimal temperatures. You will also need a piping bag so that you can then distribute the chocolate well and cleanly.
Tempering chocolate – how it works
Once you have all the tools ready, you can start tempering. Proceed as follows:
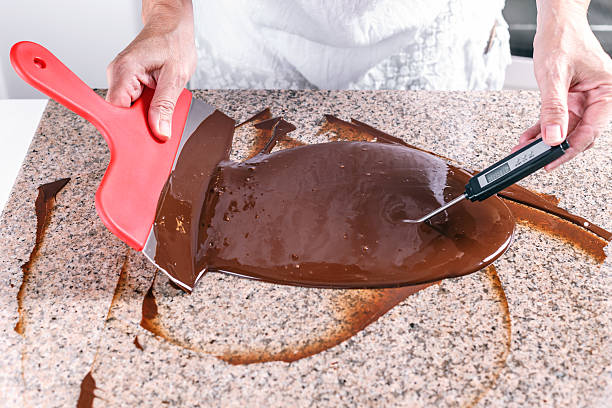
- Chop up the amount of chocolate you want to temper. It just needs to be broken up into small pieces so that it melts better. Then put at least half in the metal bowl and slowly melt it there in a water bath. It is even better if you melt two-thirds of the chopped chocolate in the first step. Depending on the type of chocolate, the melting temperature is between 40 and 50 degrees Celsius.
- Turn off the water bath and remove the bowl, then add the rest of the chopped chocolate. Then let the chocolate cool down to around 26 degrees Celsius. Check the temperature regularly with the kitchen thermometer.
- Tip: After adding the remaining chocolate, the mixture cools down relatively quickly. You can also leave the water bath on a low setting and just remove the bowl to cool. The water is kept at the right temperature and you save energy because you don’t have to reheat it all over again.
- As soon as the chocolate has reached 26 degrees Celsius, place the bowl back in the water bath. Now heat the mixture to around 33 degrees Celsius. Afterward, it can already be used. Note: If the shine is not enough for you, let the mixture cool down again and then heat it again.


Facebook Comments