Ingredients for 1 servings:
- 2 tbsp water
- 6 eggs
- 190 g sugar
- 1 packet of vanilla sugar
- 170 g flour, type 405
- 1.1 packs of baking powder
- 20 g cocoa powder
- 20 cookies (Oreo)
- 500 g cream cheese
- 2 tbsp powdered sugar
- 2 tbsp milk
- 1 pack of gelatin (instant)
- 500 g whipped cream
- 2 packets of vanilla sugar
- 2 packs of cream stiffener
- 2 egg whites
- 4 tbsp powdered sugar
- 3 tbsp cocoa powder
- 150 g butter, melted
- Chocolate, white
Instructions
Working time approx. 45 minutes; Rest time approx. 2 hours; Cooking/baking time approx. 30 minutes; Total time approx. 3 hours 15 minutes
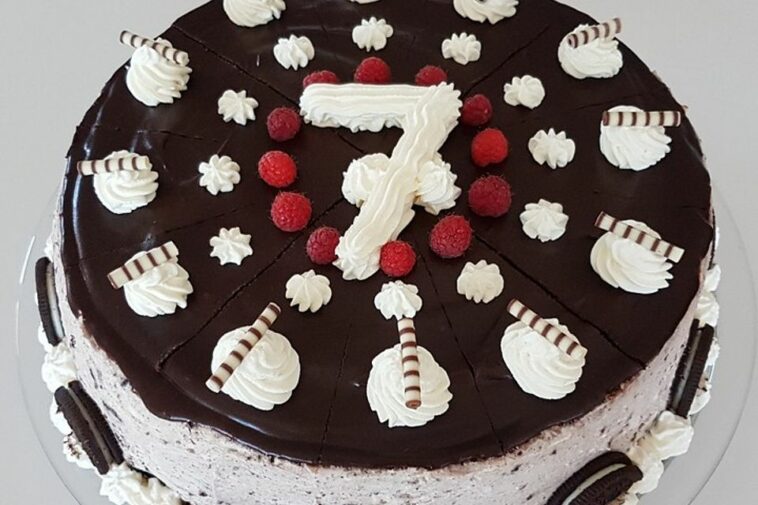
an Oreo cookie in XXL
Sponge cake: Beat the eggs with the water, sugar, and vanilla sugar until frothy. Mix the flour with the baking powder and cocoa powder, sift it into the egg mixture, and carefully fold it in. Pour the batter into a 28 cm springform pan and bake in a preheated oven at 160°C (fan setting) for about 25-30 minutes. Once cooled, cut the base in half horizontally. Filling: Beat the whipped cream with the vanilla sugar and cream stiffener until stiff peaks form and refrigerate. Halve the Oreo cookies with a knife, scrape off the filling, and place in a bowl. Set aside 16 Oreo halves, place the remaining 24 halves in a freezer bag, and pound into fine pieces with a meat mallet; you can also do this in a mixer. Add the cream cheese, powdered sugar, and milk to the scraped Oreo filling in the bowl and beat until smooth. Carefully add the instant gelatin and mix well. Fold in the cream. Fill a piping bag with some of the mixture and pipe a ring around the edge of the sponge cake. Fold the cookie crumbs into the remaining mixture and spread half of it into the piped ring. Cover with the 16 Oreo halves and cover with the remaining filling. Place the sponge cake lid on top and press down lightly. Glaze: Mix the egg whites with the powdered sugar well, do not beat! Add the cocoa powder and stir until smooth. Then add the melted butter, mix everything into a glossy glaze, and glaze the sponge cake lid. If you like, you can decorate with white chocolate. The advantage of this homemade glaze is that it looks beautiful, is easy to cut when chilled, and tastes really good. Tip for the sponge cake (I got this from a baker): When the sponge cake has a firm layer on top that you can easily handle—despite the heat from the oven—it’s ready. It won’t collapse as it cools and will have the perfect consistency inside. This test is more suitable for a biscuit than the “skewer test”.

Facebook Comments