 John Myers
Ingredients for 1 servings:
- 1 liter of water
- 3 cubes of chicken broth
- 500 g flour
- 125 g butter or oil
- 1 tbsp salt
- 500 g minced meat
- 1 small onion(s)
- 2 cloves garlic
- 2 tbsp tomato paste
- 2 tbsp oil for frying
- 1 bunch of parsley
- some salt and pepper
- Paprika powder
- 1 egg(s)
- 125 ml milk
- breadcrumbs
- some oil
Instructions
Working time approx. 1 hour 30 minutes; Cooking/baking time approx. 15 minutes; Total time approx. 1 hour 45 minutes
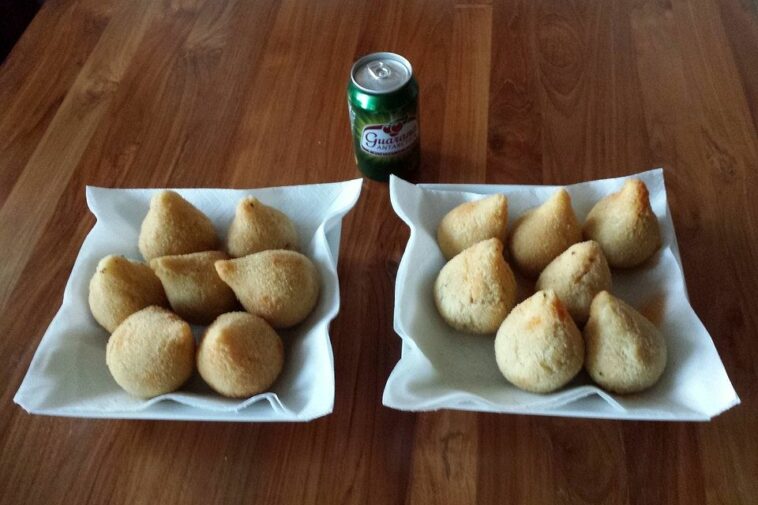
Brazilian dough balls with minced meat filling, with the Philips Airfryer
This quantity is enough for about 20 loaves. For the dough: Add the stock cube and oil or butter to the water, bring to a boil, preferably using a large pot. Meanwhile, sift the flour. Reduce the heat and gradually add the flour to the boiling broth, stirring constantly (using a sturdy wooden spoon!). (If you have strength and skill, you can do it yourself; otherwise, a helping hand to steady the pot isn’t a bad idea.) Stir the flour mixture until the dough starts to loosen from the bottom of the pan, then turn off the stove and continue stirring. I’ve found it works best to “pierce” the dough piece by piece with a wooden spoon. Pierce the dough for about 5-10 minutes. When the stove is cold enough that the dough no longer sticks to the bottom, let the mixture simmer with the lid closed. (The heat will cause the dough to lose its flour flavor, similar to béchamel sauce.) For the filling: Heat a pan (medium heat) and add oil. Finely chop the onion and garlic and add them to the heated pan, sautéing until translucent. Add the tomato paste, stirring constantly. Increase the heat and sear the minced meat. Season with salt, pepper, and paprika, and finally add the chopped parsley. Let the mixture cool. Filling: Coxinhas means “little thighs,” so the goal is to create a teardrop shape reminiscent of chicken thighs. To do this, form some dough into a ball and form a flat nest with your fingers. Then add a small spoonful of minced meat to the center (please don’t add too much, or it will ooze out) and close the nest in a drop-shaped manner. This requires a bit of practice at first, but it works quite well. Breading: Finally, whisk the egg with milk, add the breadcrumbs to a second bowl. Coat the finished coxinhas in breadcrumbs and deep-fry until golden brown. The goal is for the batter to be crispy on the outside and nice and soft on the inside. This works perfectly with the Philips Airfryer. To do this, brush or spray the coxinhas with a little oil beforehand and place them in the Airfryer at 180°C for 10-15 minutes until they are a lovely golden brown. The flavor remains excellent, but not as greasy as in a conventional fryer.


Facebook Comments